
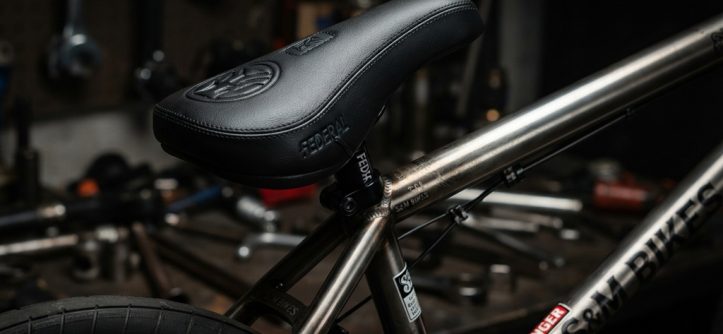
Your BMX bike is a reflection of how you ride. You’ve dialed in the tires, bars, and drivetrain, but if you’re still sitting on a stock seat that feels like a brick, you’re missing out on comfort, control, and style. Whether you’re hitting the skatepark, shredding trails, or just cruising the streets, upgrading your saddle can transform your entire riding experience. But with so many shapes, sizes, and materials on the market, choosing the right one can be overwhelming. This guide breaks down exactly what you need to know to upgrade BMX seat components like a pro, covering fit, materials, geometry, and installation—without the guesswork.
Key Takeaways
- BMX seats are designed for specific disciplines; a park bike requires a different saddle than a street or dirt jumper.
- Material choices (Pivotal vs. Railed) dictate weight, adjustability, and compatibility with your current seat post.
- Comfort starts with the right width and shape, not just padding thickness.
- Proper installation and torque specs prevent stripped bolts and premature saddle failure.
- Ignoring the rider’s weight and riding style leads to premature wear on rails and covers.
Why the Stock Seat Has to Go
Most complete BMX bikes come with a basic, heavy seat that is rarely designed for performance. These stock saddles often feature thick, bulky foam that gets in the way during tricks and can cause chafing when you shift your weight. The primary reason to consider a saddle swap is weight reduction and clearance. A lighter seat makes the bike easier to whip around in the air, while a slimmer profile keeps your pants from catching during tailwhips or barspins.
Furthermore, the stock seat on many entry-level bikes is attached with cheap hardware that loosens after a few sessions. Upgrading to a high-quality component doesn’t just feel better; it ensures your setup stays tight and reliable when you need it most. If you are looking for a comprehensive guide on local options and specific brands that suit the Texas riding scene, you might want to check a resource on how to upgrade BMX seat choices based on regional heat and humidity factors.
Understanding the Two Main Standards: Pivotal vs. Railed
Before you buy anything, you must know which mounting system your frame and seat post support. Mixing these up is the most common mistake beginners make. The two standards are entirely incompatible without adapters.
Pivotal Seats and Posts
Pivotal systems feature a seat with a single, integrated bolt hole in the center of the base. The seat post has a flat top with a matching hole. The seat is locked down using one large 8mm Allen bolt. This design is popular among park and street riders because it is lightweight and allows for infinite angle adjustment. The base is usually made of a stiff composite plastic, which provides a solid platform for sliding and landing on rails.
- Pros: Lighter weight, easier angle adjustment, simplified look, fewer parts to loosen.
- Cons: Usually have less padding, less fore/aft adjustment range, requires a specific Pivotal post.
Traditional Railed Seats
Railed seats use two metal rails (usually steel or hollow chromoly) attached to the underside of the base. They clamp onto the seat post with a two-bolt or single-bolt clamp. This old-school standard offers a wider range of fore/aft movement, which allows riders to slide the seat forward to keep it out of the way during tricks.
- Pros: More adjustability in position, often more padded for long trail rides, available in retro styles.
- Cons: Heavier due to rails and clamp mechanism, more parts to potentially break.
Finding the Ideal Seat Profile for Your Riding Style
Matching your seat’s shape to your specific riding discipline is crucial for maximum control and comfort, as a bulky trail saddle will only hinder performance in the skatepark. Just as dialing in your bike’s geometry directly impacts your execution on the ramps, wearing the right performance apparel keeps you cool and flexible during demanding sessions—explore our full breakdown on choose the best gym clothes for men in 2026 to ensure your riding gear matches your high-performance setup.
Street and Park Riding
For riders who spend most of their time on ledges, rails, and in the air, smaller is better. Look for slim, compact seats with a rounded nose. These prevent the seat from catching on obstacles when you rotate the bike 360 degrees. The padding should be firm—it’s more of a “landing pad” for an occasional sit-down than a cruiser sofa. A short nose (often called a “fat” or “stubby” style) is ideal for barspins, as it creates more clearance between your knees and the saddle.
Dirt Jumping and Trails
Dirt jumpers often pedal longer distances between jumps and need a bit more rear-end support. A mid-sized seat (around 6.5 to 7 inches long) with a slightly convex shape is the sweet spot. It should have enough padding to be comfortable while standing, but not so much that you sink into it when you sit. The rails on dirt jumpers should be chromoly steel to handle the harsh impacts of landing on ramps.
Racing (BMX Race)
Race seats are typically long and narrow, almost like road bike saddles. This allows the rider to move forward and backward significantly to shift weight during sprints and jumps. They usually have a smooth, slippery cover to reduce friction on the inside of the thighs when the rider leans back. Weight is critical here, so race seats are often the most expensive due to the use of carbon fiber bases and titanium rails.
Material Matters: Padding, Covers, and Rails
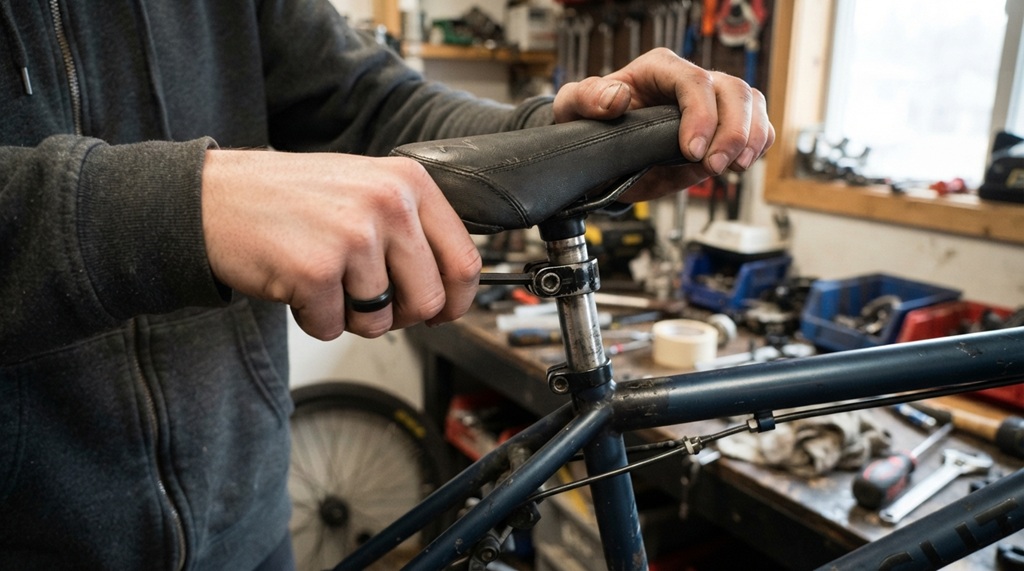
Beyond the standard, the materials dictate durability and weight. It is crucial to look at the build-up of the seat itself to ensure it lasts through your abuse.
Cover and Padding
Most aftermarket seats use a “Kevlar” or “Cordura” side material with a microfiber top. The sides need to be abrasion-resistant because they grind against concrete every time you slide. The top material should be grippy enough to keep you from sliding off when you land, but smooth enough to allow quick repositioning. Vacuum-sealed covers (thin, heat-shrunk plastic) are popular for saving weight, but they are loud and can crack over time. Seats with a sewn base tend to flex more, which some riders prefer for absorbing rattling vibrations.
Rail Materials
| Rail Type | Weight | Durability | Best For |
|---|---|---|---|
| Steel | Heavy | Very High | Street, Dirt, Budget builds |
| Chromoly | Medium | High | Most disciplines, Standard on quality seats |
| Titanium | Very Light | Medium (can bend on hard impacts) | Race, Park (weight weenies) |
If you frequently snap seat rails during tailwhips or just slam the seat down hard, stick with thick chromoly. Titanium is great for racing but adds cost and isn’t as forgiving against heavy side loads.
How to Install Your New Seat Post and Saddle
Once you have the right seat in hand, swapping it out is a quick job that takes under ten minutes. However, doing it wrong can strip threads or cause the seat to slip mid-ride.
Step-by-Step Pivotal Installation
- Remove the old setup: Loosen the seat post clamp on the frame and slide the post out. Remove the old seat by unscrewing the 8mm bolt.
- Align the post: Place the new Pivotal seat on the post. Ensure the bolt hole lines up perfectly.
- Torque down: Apply grease to the threads of the bolt. Thread the bolt in, but do not tighten it fully yet.
- Adjust angle: Sit on the bike and set the angle so it is level or slightly nose-up. Tighten the 8mm bolt securely. Tighten the seat post clamp to your frame’s torque specification (usually around 25–30 Nm on aluminum frames).
Step-by-Step Railed Installation
- Check the clamp: Remove the seat from the post by loosening the two pinch bolts on the underside of the clamp.
- Position the rails: Place the new seat’s rails onto the clamp. Slide the seat forward or backward depending on your preferred clearance.
- Even the gap: Make sure the rails are seated evenly in the clamp. They should not be angled, or they will bend under load.
- Tighten in increments: Alternate tightening the two bolts (or one bolt, depending on design) a few turns at a time until they are snug. Ensure the seat doesn’t wobble.
Pro Tip: Always use a torque wrench on carbon or aluminum posts. Overtightening the saddle clamp is a leading cause of cracked seat posts.
Common Mistakes to Avoid When Upgrading
Upgrading seems simple, but there are a few traps that riders frequently fall into. Here is what to watch out for.
- Ignoring Post Compatability: Buying a Pivotal seat when your frame has a railed post (or vice versa) requires buying a whole new post. Budget for this cost upfront.
- Going Too Short: While tiny seats look cool at the park, they are insufferable on a 10-mile trail ride. Consider your longest ride duration, not just your trick repertoire.
- Forgetting the Seat Guts: The plastic “guts” or internals of the seat absorb impact. Cheap seats have flimsy plastic that cracks, causing the seat cover to sag. Spend the extra $10 for a known brand with reinforced nylon bases.
- Overlooking Post Length: If you are upgrading to a shorter seat, you might actually want to run a longer post to keep the seat in the same relative position for pedal clearance.
Weight vs. Durability: Finding the Balance
There is a constant trade-off in the BMX industry between reducing grams and increasing strength. High-end park riders often use seats that weigh under 8oz (around 220g) with plastic posts. While this reduces rotating weight—making the bike spin much faster—these setups are fragile and can snap if you land awkwardly on a ledge.
For the average rider, a total seat/post combo weight of around 450-500g offers the best balance. This provides enough heft to handle the abuse of concrete and metal rails while still feeling relatively light in the air. If you want to save weight, look for a seat with a hollow “Lycra” cover rather than a thick vinyl one, as this shaves weight without sacrificing the structural integrity of the base.
Frequently Asked Questions
Can I put a BMX seat on a regular mountain bike?
Yes, but the geometry is different. BMX seats are smaller and lack the cutouts found on mountain bike saddles. They are only recommended if you are riding the MTB like a jump bike or skatepark ripper—not for long-distance trail riding or climbing.
How do I know if my seat needs a Pivotal or railed post?
Check the bottom of your current seat. If there is one large hole in the center of a flat plastic base, it is Pivotal. If there are two metal bars (rails) running parallel, it is a railed system. Alternatively, check the top of your seat post: a flat flat-top indicates Pivotal; a clamp mechanism indicates railed.
Why does my new BMX seat still hurt?
Pain could be caused by the angle of the seat. If it is tilted nose-up, it presses on your pelvis. Try setting it perfectly level. Also, ensure your seat post isn’t too tall, forcing you to stretch awkwardly. If the pain persists, the seat is likely too narrow for your sit bones, and you should look for a “fat” style seat with more surface area.
Are plastic seats better than padded ones?
Plastic (composite) seats are better for grinding and sliding because they are stiff and offer no friction. Padded seats are better for actual sitting comfort. For pure street or park riding, plastic is standard. For cruising or racing, a padded favorite is recommended.
How often should I replace my seat?
Replace the seat when the cover has a tear that exposes the foam (which soaks up water and rot), when the base cracks, or when the rails bend. If your seat is flopping around even when tightened, the nylon base has likely stripped—do not ride this, as it can separate and cause a crash.
Conclusion
Upgrading your BMX seat is one of the highest-impact modifications you can make for ride quality and trick performance. It’s not just about looking cool; it’s about selecting the correct standard (Pivotal vs. Railed), the right shape for your discipline, and the right material build for your weight and riding style. Take the time to check your current seat post compatibility first, then choose a saddle that matches the type of riding you actually do 90% of the time. Whether you prioritize featherweight for spin tricks or a sturdy platform for hard tails, the perfect seat is out there. Now that you know the specifics, go grab that tool and make the swap—your bike will feel completely different on the next ride.



Leave a Reply