
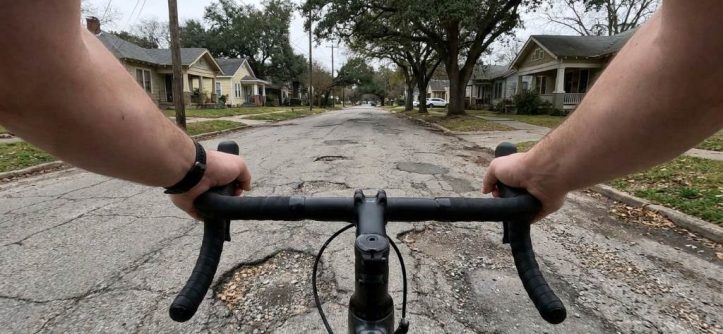
Your handlebars may feel too low because your bike setup does not match your riding position or Austin’s road conditions. A low cockpit can shift weight forward, strain your wrists, and reduce comfort, especially across rough pavement. Even riders who understand 5ft 11 hybrid bike sizing can experience this issue after changing bikes, stems, or saddles. Austin’s bicycle network now exceeds 1,200 planned priority-network miles, making fit important across varied routes.
Key Takeaways
- Bike fit matters: Low handlebars can result from frame geometry, stem length, saddle position, or spacer placement.
- Road surfaces matter: Potholes, rough pavement, drainage grates, and debris amplify discomfort through your hands and arms.
- Do not raise everything blindly: Small cockpit adjustments work better when you identify the actual cause first.
- Check your saddle: An overly high or rearward saddle can make the handlebars feel unnecessarily low.
- Use controlled changes: Adjust one component at a time and test your usual route before making another change.
- Know when to seek help: Persistent numbness, pain, or poor control deserves a professional bike-fit assessment.
How Austin Roads Change Your Riding Position
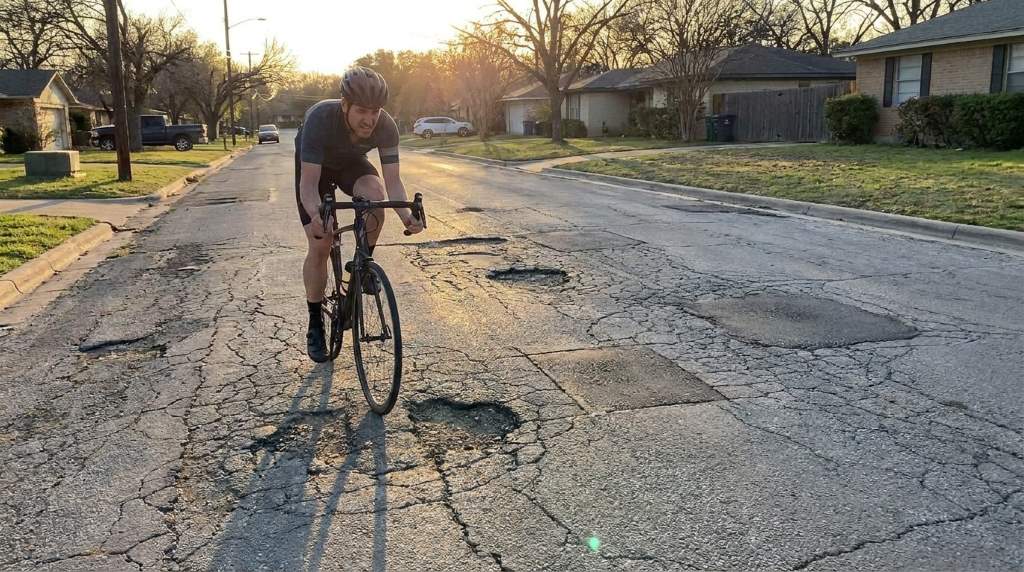
Austin gives cyclists a mixture of smooth paths, urban streets, hills, traffic corridors, and imperfect pavement. The city’s bicycle plan specifically recognizes potholes, improper drain grates, loose rocks, and pavement irregularities as serious cycling concerns. Therefore, a cockpit that feels acceptable elsewhere can feel noticeably lower on demanding Austin routes.
Road vibration also changes how you perceive handlebar height during longer rides. When your hands repeatedly absorb impacts, your shoulders may tighten and your wrists may carry excessive pressure. Consequently, raising the bars slightly can improve comfort without changing your entire bicycle.
Austin’s network includes protected lanes, neighborhood bikeways, and shared-use paths, but conditions vary between facilities. The city currently plans an extensive all-ages-and-abilities network exceeding 1,200 miles. That variety means riders should optimize fit for both comfort and control rather than one ideal road.
Before changing components, inspect the routes where your handlebars feel lowest. If discomfort appears mainly on rough streets, vibration may expose a marginal fit problem rather than create one.
You can also compare your riding posture after several miles instead of judging your position while stationary. Fatigue often reveals excessive reach, excessive saddle height, or insufficient handlebar support.
For riders combining cycling with general fitness, lose weight with exercises can provide broader training context. However, fitness improvements cannot compensate for a cockpit that consistently places excessive pressure on your hands.
Why Rough Pavement Makes Low Bars Feel Worse
Low handlebars naturally encourage a more forward torso position. That position can work efficiently on smooth pavement, yet repeated impacts increase the load reaching your palms and shoulders.
Furthermore, a low cockpit can reduce your ability to relax your elbows. Bent elbows act like suspension, while locked arms transfer more road shock directly toward your hands.
Five Reasons Your Handlebars Feel Too Low
The sensation usually comes from several interacting measurements rather than one faulty component. Start with the simplest possibilities before replacing expensive parts.
1. Your Stem Sits Too Low
Many modern bicycles use headset spacers to fine-tune handlebar height. If your stem sits directly above the headset with minimal spacers, your cockpit may sit lower than necessary.
However, never remove or rearrange headset components without understanding your fork and stem’s requirements. The steerer tube must maintain proper clamping engagement and safe adjustment.
2. Your Stem Reaches Too Far
Handlebar height and reach work together, so a long stem can make the bars feel lower. You may respond by leaning farther forward, increasing pressure across your hands and shoulders.
A shorter stem can bring the bars closer without necessarily raising them. Nevertheless, changing stem length can affect steering response, so make small changes and test carefully.
3. Your Saddle Sits Too High
An excessively high saddle can create the illusion of low handlebars. Your hips may rock while pedaling, and your torso may stretch downward toward the controls.
Check whether your knee extends excessively at the bottom of each pedal stroke. Also watch for hip movement, unstable foot pressure, or frequent reaching toward the bars.
4. Your Saddle Sits Too Far Back
A rearward saddle increases your effective reach to the handlebars. As a result, the same bar height can suddenly feel much lower and farther away.
Try assessing saddle position before purchasing a new stem. A modest adjustment can restore balance while preserving the bicycle’s original steering characteristics.
5. Your Bike Geometry Does Not Suit You
Different bicycles place riders differently because frame geometry determines stack, reach, head-tube angle, and intended posture. A performance-oriented frame can feel dramatically lower than a comfort-focused hybrid.
Consequently, component adjustments have limits when the underlying frame size or geometry does not match your body. Persistent discomfort may indicate a sizing problem rather than a handlebar problem.
How to Check Whether Your Bars Are Actually Too Low
Do not rely on appearance alone when judging handlebar height. Instead, evaluate your posture, control, comfort, and movement throughout a normal ride.
Use This Four-Point Riding Check
- Wrists: Keep them reasonably neutral instead of sharply bent backward.
- Elbows: Maintain a relaxed bend that allows your arms to absorb road impacts.
- Shoulders: Keep them relaxed rather than constantly shrugged or pulled forward.
- Vision: Maintain a natural forward view without repeatedly lifting your head.
If several points fail simultaneously, your cockpit probably needs attention. Moreover, symptoms that disappear when you briefly sit more upright provide useful evidence.
Take a short video from the side while riding on a quiet, safe section. Review your position while pedaling naturally rather than posing for the camera.
Look for excessive back rounding, locked elbows, shrugged shoulders, or repeated wrist extension. These clues help distinguish handlebar height problems from unrelated discomfort.
Your bicycle should also allow confident braking and steering from your normal hand position. Never prioritize a visually aggressive posture over reliable control on public roads.
For riders building a broader routine, healthy lifestyle habits can support consistent cycling. Still, equipment fit remains a separate issue that deserves direct attention.
How to Raise Your Handlebars Safely
Raising your handlebars can solve discomfort, but the correct method depends on your bicycle’s steering system. Many bikes allow limited height adjustment through spacers or stem orientation.
Start With the Least Invasive Adjustment
First, inspect the available headset spacers above and below your stem. If your bike permits a safe spacer rearrangement, a qualified mechanic can raise the stem within the manufacturer’s limits.
Next, inspect whether your stem can safely flip to a different angle. Some stems provide additional rise when reversed, although the resulting position may change reach slightly.
Do not exceed the steerer tube’s maximum adjustment range. Also avoid improvising with unapproved components, loose bolts, or insufficient clamping depth.
Consider a Higher-Rise Handlebar
A riser handlebar can increase hand position without replacing the frame. This option can work well when you need moderate height and your existing handlebar provides insufficient adjustment.
However, verify clamp diameter, brake compatibility, cable length, and manufacturer specifications first. Modern bicycles can use different standards, and compatibility problems can create serious control issues.
Reconsider the Stem
A shorter or higher-rise stem can change your cockpit more substantially than spacer adjustments. Choose the change according to your actual reach and posture rather than appearance.
After installation, check every control before riding. Confirm secure stem bolts, correct handlebar alignment, brake operation, and adequate cable movement.
For BMX riders or compact bicycles, seat position can also influence how the entire cockpit feels. A guide covering how to upgrade BMX seat position illustrates why contact points should work together.
Why You Should Not Simply Raise the Bars as High as Possible
More height does not automatically create better ergonomics. Excessive elevation can reduce front-end weight, alter steering behavior, and create an unfamiliar handling response.
Additionally, changing bar height changes your relationship with the saddle and pedals. You should therefore evaluate the complete riding position rather than treating the handlebars as an isolated component.
A moderate adjustment often provides the best compromise between comfort, control, and efficient pedaling. Make one change, ride your normal route, and record what improves.
If your hands still feel overloaded, investigate reach and saddle position next. This systematic approach prevents expensive component swapping without solving the underlying issue.
Austin-Specific Riding Factors to Consider
Austin’s cycling infrastructure continues expanding, yet riders still encounter changing pavement quality across routes. The city’s bicycle planning documents emphasize maintenance because bicycles react strongly to surface irregularities.
Therefore, route selection can influence how your cockpit feels. A setup that works beautifully on smooth paths may feel harsh when your route includes rough shoulders, patched asphalt, or drainage structures.
Heat can also affect your riding behavior during longer Austin rides. Fatigue encourages riders to grip the bars harder, which can make an already low cockpit feel even more uncomfortable.
Instead, relax your grip and keep your elbows soft whenever conditions allow. Use a safe line that avoids road defects without making sudden movements around traffic.
Pay special attention near construction zones and areas with temporary surface changes. Loose debris and uneven pavement can increase vibration regardless of your bicycle’s fit.
Build a Route-Based Fit Test
Choose one familiar route that represents your normal riding conditions. Ride it after each adjustment and compare wrist pressure, shoulder tension, steering confidence, and overall fatigue.
Keep the variables consistent whenever possible. Similar tire pressure, clothing, riding duration, and route direction make your comparisons more meaningful.
Record each adjustment in simple notes. This prevents you from forgetting which change actually improved your position.
When a Professional Bike Fit Makes More Sense
A professional fit becomes valuable when simple adjustments fail to resolve recurring discomfort. It also helps when you cannot determine whether frame size, saddle position, reach, or bar height causes the problem.
A qualified fitter can assess your body position while you pedal. They can then connect saddle height, saddle setback, reach, stack, cleat position, and handlebar placement.
Consider professional help if you experience persistent hand numbness, recurring wrist pain, shoulder discomfort, or unstable handling. These symptoms deserve attention rather than repeated component experimentation.
A fitting also makes sense after changing bicycle types. Moving between road, gravel, hybrid, mountain, and BMX designs can require substantial posture changes.
Remember that an effective fit does not need to look aggressive. The correct position should support controlled movement, efficient pedaling, comfortable breathing, and confident handling.
Common Mistakes Riders Make With Low Handlebars
One common mistake involves copying another rider’s setup. Body proportions, flexibility, riding goals, bicycle geometry, and route conditions vary too much for direct comparison.
Another mistake involves changing several components simultaneously. When everything changes together, you cannot identify which adjustment caused improvement or created a new problem.
Some riders also compensate for low bars by sliding forward on the saddle. That temporary solution can alter pedaling mechanics and create new pressure points.
Finally, riders sometimes ignore tire pressure when evaluating vibration. Correct pressure cannot fix poor fit, but inappropriate pressure can magnify road harshness substantially.
A Practical Adjustment Sequence
Use a structured sequence instead of randomly moving components. Start with observations, then make the smallest reasonable adjustment.
- Inspect posture: Check wrist angle, elbow bend, shoulder tension, and natural forward vision.
- Check saddle height: Look for excessive knee extension, hip rocking, or unstable pedal pressure.
- Check saddle setback: Assess whether your position creates excessive reach toward the controls.
- Inspect cockpit height: Review available spacers, stem rise, and handlebar geometry.
- Change one variable: Make one controlled adjustment before testing again.
- Test your route: Ride familiar Austin roads and compare comfort under realistic conditions.
- Seek professional help: Get a fitting when discomfort or uncertainty persists.
This process keeps the diagnosis logical and reduces unnecessary spending. More importantly, it helps you create a repeatable setup that works beyond one short ride.
Conclusion: Fix the Position, Not Just the Symptom
If your handlebars feel too low on Austin roads, start by examining your complete riding position. Saddle height, saddle setback, stem dimensions, spacers, handlebar rise, and frame geometry can all contribute.
Then consider Austin’s road conditions because rough pavement can magnify even minor fit problems. Make small changes, test them consistently, and prioritize control over an aggressive-looking posture.
If you cannot identify the cause, schedule a professional bike fit before buying more components. Take a few minutes today to inspect your saddle, cockpit height, and riding posture before your next Austin ride.
Frequently Asked Questions
Why do my handlebars suddenly feel too low?
Your saddle position, stem configuration, bicycle geometry, or riding posture may have changed enough to alter your effective reach.
Can rough Austin roads make low handlebars feel worse?
Yes, rough pavement can increase hand and shoulder loading when a low cockpit already places substantial weight forward.
Will raising my handlebars improve wrist comfort?
Raising the bars can reduce wrist extension and forward reach when those factors cause your discomfort.
Should I adjust the saddle before raising the handlebars?
Yes, check saddle height and setback first because incorrect saddle positioning can make properly positioned handlebars feel too low.
When should I get a professional bike fit?
Consider professional fitting when discomfort persists after basic adjustments or when frame geometry creates ongoing positioning problems.




Leave a Reply